Categories
Articles

Vimeo Moogaloop Actionscript API In Flex 4

I wanted created a video switcher for Vimeo videos using Flex 4. I found my way to the Vimeo Moogaloop API page where there seemed to be a harmless Actionscript 3 class demonstrating a Flash application. Moogaloop is the name Vimeo uses for the embedded video player.

The Moogaloop player is a Flash movie that must be loaded into your Flash movie. The example on the Moogaloop API page is an example of that process. The Moogaloop player contains the API you need to interface with the video player once it is loaded.

The example showed an interface, api_loadVideo(id), to load a video into the Moogaloop player. The way the example worked is that loading of the Moogaloop player requires a video to load. Then the interface suggests this api_loadVideo is how you load a second.

I set up an Actionscript project in Flex Builder 4 and found the api_loadVideo(id) code was not loading videos. I posted my findings on the Vimeo api forum (see Does moogaloop.api_loadVideo( id); work in Flash example work?) and fairly promptly got a reply to try it again where it now worked. So it appeared I hit a bug and it was fixed.

I found more issues with switching videos with Moogaloop. They all centered around the video controls not maintaining a consistent state. After extended two day effort of multiple trial and error sessions, I solved most of the issues. The one issue still hanging is that the auto hide state of the player controls stays on after the first video plays. So if you load a second video, the player controls will auto hide until mouse rolls over the player. The user interface expectation of a new video being keyed for a first play is to have the player controls visible until the video plays. I added this observation to the original forum post to see if we get some updates that make switching videos more seamless to the user.

At this point I just have a Flex project for downloads.

[ad name=”Google Adsense”]
Application Class – VimeoMoogaloopEx01_Flex.mxml
This is the main MXML file. Nothing special here other than using the new SpriteVisualElement component to contain the VimeoPlayer class. There are two buttons switching the videos.

Note you must get an Application id from Vimeo and put that on line 21.

Also add Vimeo video ids on lines 25 and 29.

<?xml version="1.0" encoding="utf-8"?>
<!--
/**
* Demo of Vimeo Moogaloop video player switching between two videos.
* */
-->
<s:Application xmlns:fx="http://ns.adobe.com/mxml/2009" 
			   xmlns:s="library://ns.adobe.com/flex/spark" 
			   xmlns:mx="library://ns.adobe.com/flex/mx" 
			   creationComplete="creationCompleteHandler(event)"
			   width="800" height="400">
	<fx:Script>
		<![CDATA[
			import com.vimeo.moogaloop.VimeoPlayer;
			
			import mx.events.FlexEvent;
			
			/**
			 * Vimeo developer id.
			 * */
			private const VIMEO_ID:String = "YOUR VIMEO APPLICATION ID GOES HERE";
			/**
			 * Vimeo video id for the first loaded video.
			 * */
			private const VIDEO_ID_1:int = PUT A VIMEO VIDEO ID HERE;
			/**
			 * Vimeo video id for the second video.
			 * */
			private const VIDEO_ID_2:int = PUT ANOTHER VIMEO VIDEO ID HERE;
			/**
			 * Properties for background
			 */
			private static const backgroundColor:Number = 0x333333;
			/**
			 * The Vimeo Moogaloop video player.
			 * */
			private var vimeoPlayer:VimeoPlayer;
			/**
			 * Event handler for creationComplete event.
			 * */
			protected function creationCompleteHandler(event:FlexEvent):void
			{
				// Create the Vimeo VideoPlayer class instance.
				vimeoPlayer = new VimeoPlayer(VIMEO_ID,VIDEO_ID_1,460,300);
				// Add to SpriteVisualElement
				vimeoVideoPlayer.addChild(vimeoPlayer);
				// Disable the first video switching button.
				video1.enabled = false;
			}
			/**
			 * Event handler for the first video button MouseEvent.CLICK event.
			 * */
			protected function video1_clickHandler(event:MouseEvent):void
			{
				// Load the video.
				loadVideo(VIDEO_ID_1);
				// Reset the video switching button states.
				video1.enabled = false;
				video2.enabled = true;
			}
			/**
			 * Event handler for the second video button MouseEvent.CLICK event.
			 * */
			protected function video2_clickHandler(event:MouseEvent):void
			{
				// Load the video.
				loadVideo(VIDEO_ID_2);
				// Reset the video switching button states.
				video1.enabled = true;
				video2.enabled = false;
			}
			/**
			 * Loads a new video into the Vimeo Moogaloop player.
			 * */
			private function loadVideo(videoId:int):void
			{
				vimeoPlayer.loadVideo(videoId);
			}
		]]>
	</fx:Script>
	<!--
	UI
	--> 
	<s:BorderContainer id = "background_bc"
					   width="{width}" height = "{height}"
					   backgroundColor="{backgroundColor}">
		<s:layout>
			<s:VerticalLayout horizontalAlign="center"/>
		</s:layout>
		<s:SpriteVisualElement id = "vimeoVideoPlayer" width="460" height="350"/>
		<mx:HBox> 
			<s:Button id = "video1" label="Video 1" click="video1_clickHandler(event)" />
			<s:Button id = "video2" label="Video 2" click="video2_clickHandler(event)" />		
		</mx:HBox>
	</s:BorderContainer> 
</s:Application>

[ad name=”Google Adsense”]
VimeoPlayer Class
This is the class on the Vimeo Moogaloop API web site. It was modified to handle the mouse event override from the stage to the parent on line 108, removal of the player_mask Sprite and addition of seek and pause calls to the loadVideo method on lines 181 and 182.

Still not fully sure of the player_mask need for Flex. However upgrading the loader using Flex components is in order which I will explore if I stay with Vimeo for the project I have for a Vimeo user.

package com.vimeo.moogaloop
{
	import flash.display.Loader;
	import flash.display.Sprite;
	import flash.events.Event;
	import flash.events.MouseEvent;
	import flash.events.TimerEvent;
	import flash.geom.Point;
	import flash.net.URLRequest;
	import flash.system.Security;
	import flash.utils.Timer;
	/**
	 * Vimeo Moogaloop player class from the Vimeo web site: http://vimeo.com/api/docs/moogaloop.
	 * <p>Modified to handle issues with playing in Flex. Mask removed. 
	 * See comments where other changes were made.</p>
	 * */
	public class VimeoPlayer extends Sprite
	{
		/**
		 * Sprite container for the Moogaloop Flash movie.
		 * */
		private var container:Sprite = new Sprite(); 
		/**
		 * The Moogaloop player.
		 * */
		private var moogaloop:Object = false; 
		/**
		 * Default width of the player.
		 * */
		private var player_width:int = 400;
		/**
		 * Default height of the player.
		 * */
		private var player_height:int = 300;
		/**
		 * Timer to delay until the Moogaloop Flash movies is loaded. Could be switched for a Flex component.
		 * */
		private var load_timer:Timer = new Timer(200);
		/**
		 * param oauth_key Vimeo developer key
		 * param clip_id Vimeo video id.
		 * param clip_id Vimeo video id.
		 * */
		public function VimeoPlayer(oauth_key:String, 
										   clip_id:int, 
										   w:int, 
										   h:int, 
										   fp_version:int = 10)
		{
			init(oauth_key, clip_id, w, h, fp_version);
		}
		/**
		 * Initialize and load Vimeo Moogaloop player.
		 * */
		private function init(oauth_key:String,
							  clip_id:int, 
							  w:int, 
							  h:int, 
							  fp_version:int = 10):void
		{
			this.setDimensions(w, h);
			Security.allowDomain("*");
			Security.loadPolicyFile("http://vimeo.com/moogaloop/crossdomain.xml");
			var loader:Loader = new Loader();
			var request:URLRequest = new URLRequest("http://api.vimeo.com/moogaloop_api.swf?oauth_key=" + oauth_key + "&clip_id=" + clip_id + "&width=" + w + "&height=" + h + "&fullscreen=0&fp_version=" + fp_version);
			loader.contentLoaderInfo.addEventListener(Event.COMPLETE, onComplete);
			loader.load(request);
		}
		/**
		 * Store the dimensions.
		 */
		private function setDimensions(w:int, h:int):void 
		{
			player_width  = w;
			player_height = h;
		}
		/**
		 * Handler for the URLRequest Event.COMPLETE event. Moogaloop Flash movie
		 * loading complete.
		 */
		private function onComplete(e:Event):void 
		{
			// Add Moogaloop Flash movie to container Sprite.
			container.addChild(e.target.loader.content);
			// Provide reference to Moogaloop Flash movie API.
			moogaloop = e.target.loader.content;
			// Add the container to this.
			addChild(container);
			// Timer to wait for Moogaloop Flash movie to complete setup.
			load_timer.addEventListener(TimerEvent.TIMER, playerLoadedCheck);
			load_timer.start();
		}
		/**
		 * Handler for load_timer TimerEvent.Timer event. 
		 * Check for Moogaloop to finish setting up.
		 */
		private function playerLoadedCheck(e:TimerEvent):void 
		{
			// Moogaloop is finished configuring
			if (moogaloop.player_loaded) 
			{
				load_timer.stop();
				load_timer.removeEventListener(TimerEvent.TIMER, playerLoadedCheck);
				// remove moogaloop's mouse listeners listener
				moogaloop.disableMouseMove();
				// Add MouseEvent.MOUSE_MOVE event listener to parent.
				// Original Vimeo code added to stage.
				parent.addEventListener(MouseEvent.MOUSE_MOVE, mouseMove);
				// Broadcast COMPLETE event for Moogaloop loaded.
				dispatchEvent(new Event(Event.COMPLETE));
			}
		}
		/**
		 * Handler for parent MouseEvent.MOUSE_MOVE event.
		 * Fake the mouse move/out events for Moogaloop.
		 */
		private function mouseMove(e:MouseEvent):void 
		{
			var pos:Point = this.parent.localToGlobal(new Point(this.x, this.y));
			// Mouse event occured in this rectangle representing the player.
			if (e.stageX >= pos.x && e.stageX <= pos.x + this.player_width 
				&&
				e.stageY >= pos.y && e.stageY <= pos.y + this.player_height) 
			{
				moogaloop.mouseMove(e); // Not documented. You have to have faith.
			}
			else 
			{
				moogaloop.mouseOut(); // Not documented. You have to have faith.
			}
		}
		/**
		 * Play video in Moogaloop player.
		 */
		public function play():void 
		{
			moogaloop.api_play();
		}
		/**
		 * Pause video in Moogaloop player.
		 */
		public function pause():void 
		{
			moogaloop.api_pause();
		}
		/**
		 * returns duration of video in seconds
		 */
		public function getDuration():int 
		{
			return moogaloop.api_getDuration();
		}
		/**
		 * Seek to specific loaded time in video (in seconds)
		 */
		public function seekTo(time:int):void 
		{
			moogaloop.api_seekTo(time);
		}
		/**
		 * Change the primary color (i.e. 00ADEF)
		 */
		public function changeColor(hex:String):void 
		{
			moogaloop.api_changeColor(hex);
		}
		/**
		 * Set dimensions of this instance and Moogaloop player.
		 */
		public function setSize(w:int, h:int):void 
		{
			this.setDimensions(w, h);
			moogaloop.api_setSize(w, h);
		}
		/**
		 * Load in a different video. 
		 */
		public function loadVideo(id:int):void 
		{
			moogaloop.api_loadVideo(id);
			moogaloop.api_seekTo(0); 	// Added to code on Vimeo web site.
			moogaloop.api_pause(); 		// Added to code on Vimeo web site.
			
		}
	}
}

[ad name=”Google Adsense”]

Categories
Articles

Away3D Hello World Rotating Sphere in Flex 4 and Flash

I was looking around for an updated “Hello World” Away3D example and found many examples out of date, unnecessarily complex or not proofed for orphan code.

The unnecessarily complex examples attempted explaining more than was necessary and neglected clarifying the code.

Many examples used the “open ended object” parameters for methods and constructors. These types of parameters are the root cause for code failing both for the developers of the api and the users. A class property changes and someone forgets that the constructor has a loose compile time parameter. Thus we users are left scratching heads. Magic is cool but should be restricted to side shows. I recommend sticking with setting individual properties and avoiding these types of parameters unless there is a class to define an object to pass so the compiler can reduce the mishaps.

Learn More About Away3D from Away3D Team Members

I am using the Away3D version 3.5 code. I included that code in these examples since open source code tends to be subject to change and volatile. Many of the Away3D examples I have seen are broken with this version and the author failed to clarify the exact version they were using or take them down.

You can build this with the free Flex SDK by using the code in the src folder and be sure to include a path to the Away3D library. For Flash CS3 and later versions, you need to create a Flash Document in the src folder and set the document class to Away3D_HelloWorld_Rotating_Sphere_AS3 and then add a library path to the Away3d code or SWC if you created one. For your convenience the Flash CS4 example download is included.

This article shows the code for the Flex project.

Application Class – Away3D_HelloWorld_Rotating_Sphere_Flex
All the code is contained in this class except for the Away3D library. The applicationCompleteHandler creates the Away3D objects and event registration. This uses the Sphere primitive included in Away3D. Only the wire frame is shown so that you can see the x, y and z axes to help get a perspective. The sphere object is dead center in its container for all three axes. You are viewing the sphere from a negative position on the z axis.

<?xml version="1.0" encoding="utf-8"?>
<!--
/**
* Away3D 3.5.0 basic example showing centering a wireframe sphere in a View3D all centered on stage.
* */
-->
<s:Application xmlns:fx="http://ns.adobe.com/mxml/2009" 
			   xmlns:s="library://ns.adobe.com/flex/spark" 
			   xmlns:mx="library://ns.adobe.com/flex/mx" 
			   applicationComplete="applicationCompleteHandler(event)"
			   width="500" height="500">
	<fx:Declarations>
		<!-- Place non-visual elements (e.g., services, value objects) here -->
	</fx:Declarations>
	<fx:Script>
		<![CDATA[
			import away3d.containers.View3D;
			import away3d.materials.WireColorMaterial;
			import away3d.primitives.Sphere;
			import away3d.primitives.Trident;
			
			import mx.events.FlexEvent;
			
			// Properties for background
			private static const backgroundColor:Number = 0xcccccc;
			private static const backgroundBorderColor:Number = 0x666666;
			private static const backgroundBorderWeight:Number = 2;

			private var view:View3D;						// View to contain the Sphere
			private var sphere:Sphere;					// Sphere to animate and position.
			private var speed:Number = .1;				// Speed for sphere rotationY property

			protected function applicationCompleteHandler(event:FlexEvent):void
			{
				var wireColorMaterial:WireColorMaterial;	// Optional colors for Sphere.
								
				// Create a View3D and center on stage
				view = new View3D();
				view.x = stage.stageWidth / 2;
				view.y = stage.stageHeight / 2;
				// Add viewport to the container
				away3DContainer.addChild(view);
				
				// Create a Sphere. Default position is 0,0,0;
				sphere = new Sphere();
				sphere.radius = 250;
				sphere.segmentsW = 12; 
				sphere.segmentsH = 9;
				
				// Create a color for the sphere wire model. Optional.
				wireColorMaterial = new WireColorMaterial();
				wireColorMaterial.alpha = 0;	// Default wireColorMaterial.color is transparent.;
				wireColorMaterial.wireColor = 0x0000ff;
				sphere.material = wireColorMaterial;
				
				// Add the sphere to the scene
				view.scene.addChild(sphere);
				
				// Add x, y and z axes for position perspective.
				var axis:Trident = new Trident(250, false);
				view.scene.addChild(axis);
				
				// Register listener for the ENTER_FRAME event.
				addEventListener(Event.ENTER_FRAME, enterFrameEventHandler);
			}

[ad name=”Google Adsense”]
This code is simply the ENTER_FRAME event handler and the function for updating the view and the state of the 3D objects to create the animation. The sphere rotationY property is animated.

			/**
			 * ENTER_FRAME event handler. 
			 * */
			public function enterFrameEventHandler(e:Event):void
			{
				updateView();
			}
			/**
			 * Computes the animation changes and updates view.
			 * */
			public function updateView():void
			{
				// Rotate sphere around the Y-axis. 
				sphere.rotationY += speed;
				// Render the view.
				view.render();
			} 

		]]>
	</fx:Script>

[ad name=”Google Adsense”]
This Flex version is a spark implementation. The SpriteVisualElement is used as the container. Older versions of Flex will require creating a UIComponent.

A background is included to help see the impact of changing positioning properties of the View3d and the Sphere should you want to play.

	<!--
	Background for app 
	--> 
	<s:BorderContainer id = "background_bc"
					   width="{width}" height = "{height}"
					   borderWeight="{backgroundBorderWeight}"
					   borderColor="{backgroundBorderColor}"
					   backgroundColor="{backgroundColor}">
		
		<!--
			Container for the Away3D Sprite objects
		-->
		<s:SpriteVisualElement id = "away3DContainer" />
	</s:BorderContainer> 
</s:Application>

References
Away3d.com/

Categories
Articles

Actionscript 3 Animating Sprite Rotation Following Mouse Movement

By Lon (Alonzo) Hosford

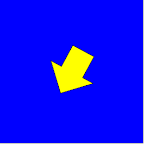
This my own version of of Keith Peter’s Foundation Actionscript 3.0 Animation: Making Things Move chapter 3 implementation of sprite rotation following a mouse.

Download files
[August 10 2010 – I updated this to an Actionscript project in Flex Builder 4. ]

Keith Peters AS3 Animation
Learn More

You can build this with the free Flex SDK by using the code in the src folder. Same for Flash CS3 and later versions. You need to create a Flash Document in the src folder and set the document class to Chapter03_Rotation_AS3. For your convenience the Flash CS4 example download is included.

This article shows the code for the Flex project.

Application Class – Chapter03_Rotation_Flex
This Flex version is a spark implementation. The SpriteVisualElement component shown on line 51 is used to add the code to the application display on line 31.

<?xml version="1.0" encoding="utf-8"?>
<!--
	Application class for showing sprite rotation following mouse movement. 
	<p>Author: Lon Hosford https://www.lonhosford.com 908 996 3773</p>
    <p>Reference: Keith Peter's Actionscript 3.0 Animation Chapter 3</p>
	
-->
<s:Application xmlns:fx="http://ns.adobe.com/mxml/2009" 
			   xmlns:s="library://ns.adobe.com/flex/spark" 
			   xmlns:mx="library://ns.adobe.com/flex/mx" width="400" height="400"
			   creationComplete="creationCompleteHandler(event)" 
			   viewSourceURL="srcview/index.html">
	<fx:Script>
		<![CDATA[
			import mx.events.FlexEvent;
			
			// Properties for background
			private static const backgroundColor:Number = 0x0000ff;
			private static const backgroundBorderColor:Number = 0x666666;
			private static const backgroundBorderWeight:Number = 2;
			/**
			 * Handler for Application creationComplete event
			 * */
			protected function creationCompleteHandler(event:FlexEvent):void
			{
				// Create an Arrow object
				var arrow:Arrow = new Arrow();
				// Wrap arrow object into a RotateSpriteToMouse object
				var rotateToMouse:RotateSpriteToMouse = new RotateSpriteToMouse(arrow);
				// Add rotateToMouse Sprite to a SpriteVisualElement
				arrowVisualElement.addChild(rotateToMouse);
				// Center the SpriteVisualElement
				arrowVisualElement.x = background_bc.width / 2;
				arrowVisualElement.y = background_bc.height / 2;
			}

		]]>
	</fx:Script>
	<!--- 
	Background for app 
	--> 
	<s:BorderContainer id = "background_bc"
					   width="{width}" height = "{height}"
					   borderWeight="{backgroundBorderWeight}"
					   borderColor="{backgroundBorderColor}"
					   backgroundColor="{backgroundColor}">

		<!--- 
		Spark container for Sprite 
		--> 
		<s:SpriteVisualElement id="arrowVisualElement" />

	</s:BorderContainer>
					   
</s:Application>

[ad name=”Google Adsense”]
RotateSpriteToMouse Class
This is the class that does the work. Listening to the Event.ENTER_FRAME event leads to the update_rotation() method that does the work of updating the rotation.

package
{
	import flash.display.Sprite;
	import flash.events.Event;
	/**
	 * Rotates sprite to mouse position
	 * */
	public class RotateSpriteToMouse extends Sprite
	{
		private var _sprite_to_rotate:Sprite;	// Sprite to rotate to mouse
		/**
		 * Constructor 
		 * @param sprite_to_rotate The sprite to rotate
		 * */
		public function RotateSpriteToMouse(sprite_to_rotate:Sprite)
		{
			_sprite_to_rotate = sprite_to_rotate;
			addChild(_sprite_to_rotate);
			addEventListener(Event.ENTER_FRAME, enterFrameEventHandler);
		}
		/**
		 * The event handler for Event.ENTER_FRAME
		 * */
		private function enterFrameEventHandler(event:Event):void
		{
			update_rotation();
		}
		/**
		 * Updates the rotation of the _sprite_to_rotate
		 * */
		private function update_rotation():void
		{
			// Triangle adjacent angle side distance for the x value.
			var dx:Number = mouseX - _sprite_to_rotate.x;
			// Triangle opposite angle side distance for the y value.
			var dy:Number = mouseY - _sprite_to_rotate.y;
			// Compute angle in radians from the sprite to the mouse position.
			var radians:Number = Math.atan2(dy, dx);
			// Convert radians to degrees
			_sprite_to_rotate.rotation = radians * 180 / Math.PI;
		}
	}
}

Arrow Class
Simple arrow sprite that Keith wrote. Key here is the center registration point.

package
{
	import flash.display.Sprite;
	/**
	 * Creates an arrow sprite with fixed dimensions
	 * */
	public class Arrow extends Sprite
	{
		public function Arrow() 
		{
			draw();
		}
		/**
		 * Draw the arrow
		 * */
		private function draw():void
		{
			graphics.lineStyle(1, 0, 1);
			graphics.beginFill(0xffff00);
			graphics.moveTo(-50, -25);
			graphics.lineTo(0, -25);
			graphics.lineTo(0, -50);
			graphics.lineTo(50, 0);
			graphics.lineTo(0, 50);
			graphics.lineTo(0, 25);
			graphics.lineTo(-50, 25);
			graphics.lineTo(-50, -25);
			graphics.endFill();
		}
	}
	
}
Categories
Articles

Actionscript 3 Animation Following the Mouse to Show Velocity at an Angle

By Lon (Alonzo) Hosford

See also the same done in HTML5 canvas HTML5 Canvas Based Animation Rotate Arrow To Mouse Position

In chapter 5 of Keith Peter’s Foundation Actionscript 3.0 Animation: Making Things Move velocity at an angle is explained. I took Keith’s mouse following example demonstrating velocity at an angle and punched it up a small notch.

Download files
[August 10 2010 – I updated this to an Actionscript project in Flex Builder 4. ]

You can build this with the free Flex SDK by using the code in the src folder. Same for Flash CS3 and later versions. You need to create a Flash Document in the src folder and set the document class to Chapter05_FollowMouse. For your convenience the Flash CS4 example download is included.

Keith Peters AS3 Animation
Learn More

This article shows the code for the Flex project. This Flex version is a spark implementation.

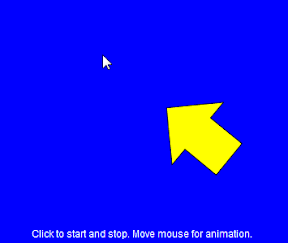
The arrow will follow the mouse around the stage. It will stop following when requested and start again with a mouse click on the stage. It also waits patiently when the mouse leaves the stage. The arrow gets real frustrated when you put the mouse over it. It always points towards the mouse when the mouse is over the stage.

Application Class – Chapter04_SprayPaint
I added user mouse click interaction to control the start and stop movement of the _arrow sprite. See line 40 and lines 48 to 51.

The movement also stops and starts when the mouse enters and leaves the stage. To accomplish that the stage needed to register a Event.MOUSE_LEAVE event to detect the mouse leaving the stage. The stage object is available when the applicationComplete(...) event occurs. The MouseEvent.MOUSE_MOVE sufficed to detect the mouse back over the stage. The _mouseOverStage variable carries the state of the mouse over the stage.

The rotation of the _arrow sprite is continuous. Gives it a mouse awareness state.

<?xml version="1.0" encoding="utf-8"?>
<!--
	Application class to demonstrate animation trigonometry to show velocity at an angle. 
    Mouse position determines the angle. 
	<p>Author: Lon Hosford https://www.lonhosford.com 908 996 3773</p>
    <p>Reference: Keith Peter's Actionscript 3.0 Animation Chapter 5</p>
	
-->
<s:Application xmlns:fx="http://ns.adobe.com/mxml/2009" 
			   xmlns:s="library://ns.adobe.com/flex/spark" 
			   xmlns:mx="library://ns.adobe.com/flex/mx" width="400" height="400"
			   applicationComplete="applicationCompleteHandler(event)"
			   viewSourceURL="srcview/index.html">
	<fx:Script>
		<![CDATA[
			import mx.events.FlexEvent;
			public static const backgroundColor:Number = 0x0000ff;
			public static const backgroundBorderColor:Number = 0x666666;
			public static const backgroundBorderWeight:Number = 2;
			
			private var _instructions_tf:TextField;						// Instructions for user
			[Bindable]
			private var _lang_instructions:String = "Click to start and stop. Move mouse for animation."
			private var _arrow:Arrow;									// Animated sprite is an Arrow 
			private var _speed:Number = 5;								// Movement speed
			private var _allowMoving:Boolean = false;					// Use allowing moving state
			private var _mouseOverStage:Boolean = true;					// Mouse on the stage state
			
			/**
			 * Handler for Application applicationComplete event
			 * */
			protected function applicationCompleteHandler(event:FlexEvent):void
			{
				// Create Arrow object and add to stage. This is animated.
				_arrow = new Arrow();
				arrowVisualElement.addChild(_arrow);
				_arrow.x = (width - _arrow.width ) / 2;
				_arrow.y = (height - _arrow.height ) / 2;
				
				
				stage.addEventListener(MouseEvent.CLICK, mouseClickEventHandler);
				stage.addEventListener(MouseEvent.MOUSE_MOVE, mouseMoveEventHandler);
				stage.addEventListener(Event.ENTER_FRAME, enterFrameEventHandler);
				stage.addEventListener(Event.MOUSE_LEAVE, mouseLeaveEventHandler);
			}
			/**
			 * MouseEvent.CLICK handler
			 * */
			private function mouseClickEventHandler(event:MouseEvent):void
			{
				_allowMoving = !_allowMoving;
			}
			/**
			 * MouseEvent.MOUSE_MOVE handler
			 * */
			private function mouseMoveEventHandler(event:MouseEvent):void
			{
				_mouseOverStage = true;
			}
			/**
			 * Event.MOUSE_LEAVE handler
			 * */
			private function mouseLeaveEventHandler(event:Event):void
			{
				_mouseOverStage = false;
			}
			
			/**
			 * Event.ENTER_FRAME handler
			 * */
			private function enterFrameEventHandler(event:Event):void
			{
				draw();
			}

[ad name=”Google Adsense”]
The draw() method on line 77 updates the animation. The dx and dy variables are the distance from the mouse to the registration point of the _arrow sprite. Radians for the angle are computed using the Math.atan2(...) method. The angle in radians is converted for Actionscript rotation property to degrees. These trigonometry formulas are covered in Keith’s book .

The state the user choose to have the mouse follow is tested and if true the moveTo() method on line 98 computes the velocity at an angle discussed in chapter 5.

The _arrow sprite is designed with a center registration point to facilitate the rotation. As a result the _arrow sprite will move until the mouse coordinates reach the registration point. I added the hitTestPoint(...) method on line 105 to adjust so that the movement stops at the edge of the pixels in the _arrow sprite. The result the _arrow sprite’s point comes very close to the mouse versus the center of the _arrow sprite.

			/**
			 * Draw
			 * */
			private function draw():void
			{		
				// Distance of arrow registration point from mouse
				var dx:Number = mouseX - _arrow.x ;
				var dy:Number = mouseY - _arrow.y ;
				
				// Get angle in radians
				var angle:Number = Math.atan2(dy, dx);
				// Rotate converting radians to degrees
				_arrow.rotation = angle * 180 / Math.PI;
				
				// Is in a mouse following state
				if (_allowMoving)
				{
					// Move based on angle
					moveTo(angle);
				}
			}
			/**
			 * Move arrow
			 * */
			private function moveTo(angle:Number):void
			{
				// Velocity based on angle
				var vx:Number = Math.cos(angle) * _speed;
				var vy:Number = Math.sin(angle) * _speed;
				
				// Mouse position overlaps shape and mouse is over a pixel in the object
				if (!_arrow.hitTestPoint(mouseX, mouseY, true) && _mouseOverStage)
				{
					// Add velocity to position
					_arrow.x += vx ;
					_arrow.y += vy ;
				}
			}
			/**
			 * Set any stage options per your needs
			 * */
			private function initStage():void 
			{
				stage.scaleMode = StageScaleMode.NO_SCALE;
			}
			/**
			 * Instructions for user
			 * */
			private function getInstructions_tf():TextField 
			{
				var tf:TextField = new TextField();
				tf.autoSize = TextFieldAutoSize.LEFT;			
				tf.background = true;
				var textFormat:TextFormat = new TextFormat();
				textFormat.font = "_typewriter";
				tf.defaultTextFormat = textFormat;
				tf.text = _lang_instructions;
				return tf;
			}
		]]>
	</fx:Script>

[ad name=”Google Adsense”]
This part of the application represents the Flex UI based in Spark components.

	<!--- 
	Background for app 
	--> 
	<s:BorderContainer id = "background_bc"
					   width="{width}" height = "{height}"
					   borderWeight="{backgroundBorderWeight}"
					   borderColor="{backgroundBorderColor}"
					   backgroundColor="{backgroundColor}">

		<!--- 
		Spark container for Sprite 
		--> 
		<s:SpriteVisualElement id="arrowVisualElement" />

	</s:BorderContainer>
	<!--- 
	Instructions 
	--> 
	<s:HGroup  horizontalAlign="center" x="0" y="378" width = "100%">
		<s:Label text="{_lang_instructions}" color="0xffffff"/>
	</s:HGroup>
					   
</s:Application>

[ad name=”Google Adsense”]